A Beginners Guide To Making Your Own Pottery Glaze - Step by Step
I imagine you found this article because you're already producing pottery and are interested in making your own pottery glazes. You're in the right place!
There are many books on glaze making which cover this topic in much more depth. To be honest I haven't read many of them - and I do like reading books.
I hope this doesn't give the impression I just chuck a load of ingredients in a bucket and hope for the best. My glazes are used for functional pottery and my children use them to eat from. I want to make sure they are done right.
I have mainly used resources from the internet to help with glaze development - I'll share those with you later. But first...

Why make your own glazes?
Perhaps if the first commercially made glazes I bought were great, I might not have started trying to make my own. The glazes I bought first were a very plain black, a boring white and a horrific green so I started researching about glaze making almost immediately.
I did choose some rubbish glazes to be fair. There are some very beautiful ready made glazes if you choose the right ones. They can be bought in powder form to just add water, or as a liquid glaze. If you have never used a glaze before it's worth buying a ready made one. It will give you experience in mixing, sieving and applying the glaze. Commercial glazes are often quite forgiving if applied a little too thin or thick, or if they are fired to not quite the right temperature.
As you can buy a perfectly good ready made glaze, the biggest reasons for making your own are:
- You have complete control. You may decide you want the glaze to be less glossy, more matt, a bit more blue, have speckles, melt at a lower temp or any other glaze variable. All these things can be altered by adjusting your recipe
- Cost. It's simply cheaper to make your own. Very roughly I'd say it's half as expensive to make your own. That's a lot of money after a few kiln loads!
If I'm selling it to you so far you might want to jump straight into buying some powder and mixing stuff up. But whoa there a minute, let's think about a bit of glaze theory first.
What are the main components of glaze?
If you've read any other articles on glaze making you may have read about the three main glaze components:
- Glass-Formers
- Fluxes
- Stabilisers
It's important to understand that certain glaze ingredients can contribute to more than one of these components. For example, the glaze ingredient Wollastonite is 52% Silica (glass-former) and 48% Calcium (flux).
But to start with let's look at the components.
Glass-formers mostly come from silica - it's the part of the glaze which actually forms the glass. There are a few technical variations but it's basically just sand.
If we were to make a glaze using only silica, the melting temperature would be around 1700 Centigrade.
To avoid having to fire at such high temperature a flux is used in glazes. Just think of flux as a little gremlin that helps make glazes melt. Lower temperature glazes need more flux.
If glazes had no Stabilisers they would melt so well they would run off the pots and all over the kiln shelf into a big puddle. The Stabilisers (Alumina and Boron) helps stiffen the glaze so it can melt to a nice glass but not run off the pot.
Developing a glaze recipe
The first glazes I made were based on some excellent documentation from the Digital Fire website. It does such a great job at describing many aspects of glazes and I suggest you read all the articles here - especially the food safe, toxicity & safety ones. At the time I was firing to cone 6 in an electric kiln, and the G1212W recipe made an ideal base.
I would recommend using a recipe like this as a base glaze for beginners. Various colouring oxides can be added to provide colour, and the quartz to clay content can be adjusted to determine how matt or glossy the glaze is.
If you are determined to create your own glaze from scratch you will need to decide on the following before creating a recipe:
- What cone / temperature is the glaze going to be fired to. This will be determined by the clay you are using, and perhaps limited by the maximum temperature of your kiln.
- Are you firing in oxidation or reduction atmospheres
- Are you looking for a matt or glossy surface to the glaze
- What colour are you aiming for
- Is the glaze to be used for food or drinks
I'm starting to feel a little overwhelmed trying to explain all this. There are so many things that counteract with each other in a glaze recipe. Perhaps it would be a good time to introduce the limit formula. I guess the limit formulas were devised to stop potters heads boggling when devising glazes.
Each ingredient in a glaze contributes a certain amount of different oxides into the glaze. If the oxide levels in your glaze is within the limit formula it should be a fairly solid glaze. See the following section about how to calculate oxide levels in glaze recipes.
If you are intending your glaze to be used on a food surface it should be within the limit formulas. I make sure all my glazes are withing limits - there's no way of knowing if someone decides to drink champagne from a flower vase. The limit formula doesn't guarantee safety, but it's a good starting point.
The limit formulas can be used as a starting point for finding how much flux is needed for each cone range. The amount of gloss can be controlled by adjusting the silica to alumina ratio within the limits.
Colouring oxides can be fickle, depending on the kiln atmosphere, base glaze ingredients the firing schedule of a kiln and many other factors. Much testing is needed to achieve the desired result.
Software and websites for calculating glaze recipes
While you could calculate glaze recipes with paper and pen, there are a few great websites that make glaze development a lot easier.
With each of these websites you enter the glaze ingredients, and a percentage amount for each one. Glazes are normally written with the main ingredients adding up to 100, and colouring ingredients as additions.
The first website I ever used was glaze simulator. This is really nice and easy to use once you get the hang of it. You can store recipes in the browser but they will disappear if you delete your cookies at any point. It has the advantage over the others that it shows a suggested cone melting range for the glaze. Some of the oxide calculations are quite different to the other websites so I'm not sure of it's ingredient accuracy.
I then used the insight live website for while. I got a free group membership through the cone6pots.ning website. Individuals can pay for membership on their own. I really appreciate the work that has gone into this program and the ingredients database and other information is amazing. The glaze calculator itself is a bit clunky to use, although I'm sure it's very accurate.
The most recent website I've used is glazy.org. This site is a great community with many recipes to browse through. It's easy to use and I really like the way you can search glazes using a colour picker. The charts that show similar glazes to the one selected are also really cool. I haven't fully explored all the features, but I think I'll be mostly using this site in future.
Buying glaze ingredients
One mistake I made when first buying glaze ingredients was buying the same amount of each type. In my glazes I use a lot of quartz, china clay and soda feldspar so I now buy these in larger quantities.
Most of the main glaze ingredients for base glazes are fairly cheap so it's not such a worry. The most expensive base ingredient are usually the frits. These can be around 5 times the price of something like clay or quartz. They are also used in much smaller quantities on glazes, so that should be reflected in your ordering
Some of the colouring oxides can get very expensive. I buy things like cobalt in very small sizes. The most a glaze is likely to use is around 1% cobalt. It's a good idea to work out your recipes and calculate the ingredients needed for a 5 kg batch to fill your glaze bucket. Doing this you can avoid overspending on ingredients that will sit in a packet for months.
Equipment needed for making glazes
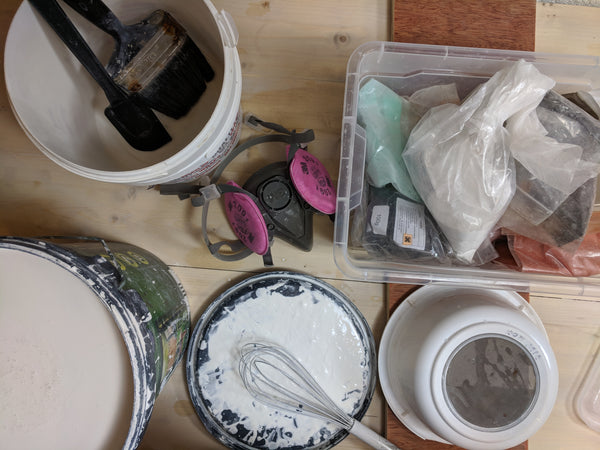
Luckily you don't need much equipment at all to start making your own glaze. I use the following basic equipment for glazing.
- Round buckets with lids. I use mostly 5 litre to 10 litre containers for glaze. Any smaller and you wont be able to dip things in there.
- Sieve - This needs to be a mesh size of 80 or finer. They are available from ceramics suppliers.
- Whisk - any old kitchen whisk for stirring up the glaze
- Respirator with p100 rated filter - search amazon, they are around £30 with filters. The cheap dust masks from DIY stores are not suitable for the fine particle sizes of glaze ingredients.
- Digital scales - I just use cheap kitchen scales. They are not very accurate for test weights but I live with it.
- Large paint brush - like for painting the walls of your house.
Respirators and a clean working environment are very important, see these articles for more info on safe working practices.
https://www.consumernotice.org/environmental/silica-dust/
https://www.consumernotice.org/environmental/silica-dust/silicosis/
Mixing your first pottery glaze
Finally! So by this stage you should have a glaze recipe, your ingredients and the equipment listed above. Good job getting this far...
Your glaze recipe will probably add up to around 100 percent, you now need to decide how much glaze to make. Usually when I'm testing a glaze for the first time I'll just mix one part, i.e around 100g of ingredients with the same weight of water. This will just make enough to dip a small test tile.
If you want to make enough glaze to dip a mug you'll probably need around 2 kg of dry ingredients mixed with around 2 litres of water. To get the weight of each ingredient in this case multiply the recipe amounts by 20 as shown below. You could use an excel spread sheet to calculate your batches if you're as geeky as me.
Recipe:
- 20 Wollastonite
- 10 Calcium Borate Frit
- 20 China Clay
- 15 Quartz
- 35 Soda Feldspar
2kg Batch:
- 400g Wollastonite
- 200g Calcium Borate Frit
- 400g China Clay
- 300g Quartz
- 700g Soda Feldspar
- Put your respirator on
- Fill a bucket with your starting amount of water ( 2 litres in this case).
- Set a container on your scales and zero them.
- Then add your first ingredient up to the specified weight. Try and create as little dusk as possible by carefully scooping ingredients out of their package rather than pouring them.
- Carefully pour the weight ingredient into the bucket with water in.
- Repeat for each ingredient and cross them off your list as you add to the bucket.
- Once all ingredients are in the water carefully whisk them together to avoid too much dust creation.
- Add more water if needed until the glaze is somewhere between milk and single cream thickness.
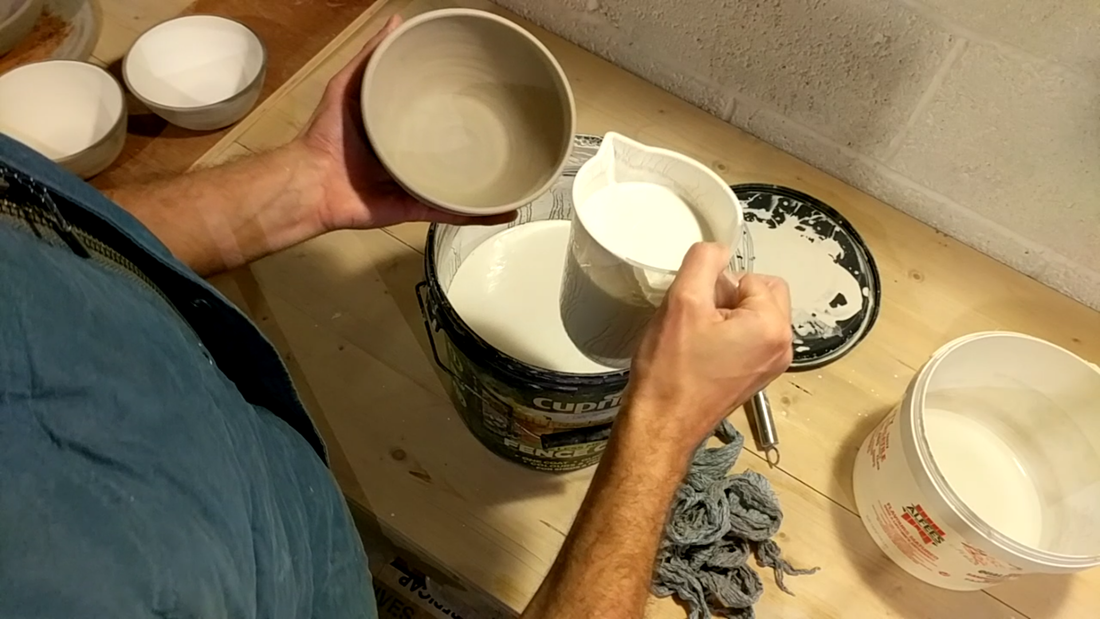
- Get another clean bucket and put your sieve on top.
- Begin pouring your mixed glaze into the sieve. Do this in stages and use the paint brush to mix around the glaze in the sieve. This bristles will help the glaze move through the sieve.
- Clean the area and tools before removing your respirator.
- Leave the glaze to sit for 24 hours before using to ensure all the particles have soaked into the water properly.
- Mix glaze with whisk thoroughly before and during use
Making your own pottery glaze conclusions
At the start I mentioned that it's important to not confuse the components of a glaze with the glaze ingredients. I took the example glaze recipe from above and entered the ingredients and quantities in glazy.org.
After saving it as a new glaze I was able to see the UMF (Unity Molecular Formula). This shows that the example glaze ingredients have the following components:
Glass-formers : 3.51 Silica
Stabilisers : 0.54 Alumina , 0.25 Boron
Fluxes : 0.23 Sodium, 0.76 Calcium
There are loads of other cool ratios and charts to see. I highly recommend having a look a Glazy - it's such a great free resource.
That's about as far as I want to take this article. Whether or not you made a good glaze is in the eye of the beholder. There are a number of tests you can do to check the safety of a glaze - see digital fire articles linked to before.
Hopefully this post was useful for you. I'm keen to make it more useful, so if there are things I didn't explain well or need expanding on please leave a comment. I will try to answer any questions you have.
If you make some killer glazes and are at the point of selling your work you may be interested in my guide to selling pottery online.
If you are just getting started in pottery you may also be interested in my beginners guide to tools and equipment.
9 comments
Hi! My question might sound really silly… but what color is that glaze? Is it just a base?? If it is, how to you go about adding color? Thanks! Love your post!
Thank you for this excellent article. It is the first one I’ve read that has begun to demystify glaze making in clear concise language. I look forward to following your blog.
Hi there!
This article was so helpful and detailed- thank you! Looks like you’re in the UK, so you might not know, but I’m wondering where you buy glaze ingredients? Is there a website or source you like? Thanks ☺️
Hi Patricia,
No this glaze probably wont flow very much. To get a lot of flow you normally need a recipe that is very low in clay and quartz, and high in flux and therefore high melt fluidity. This makes it difficult to achieve a glaze that is hard and safe to use with food, although some fluidity will be possible with some safe glazes. Look for info on Fluid Melt Glazes – Digitalfire, melty glazes etc. Good Luck, happy potting !
Hello. I’m wondering if this glaze recipe will allow the glazes to flow into each other when layered with other colors of glaze creating a ‘moving-like’ result. The current glazes i have do not move at all… even when layered with other colors. I want that flowing look.